It’s friday night and you’ve invited a girl whom you recently met to your abode. Of course you’ve prepared yourself with tasty food, a bottle of wine and last but not least, the music. A very thorough investigation of her taste of music in combination with the classical tracks have flown into a well composed playlist for all thinkable scenarios. Since you’re prepared in every single detail and with all the CDs from all the artists that she have mentioned in a conversation with you earlier, they take quite a lot of space. That’s not a problem for you though, since they’re all stored in your media library on your stationary computer.
It’s friday night and you’ve invited a girl whom you recently met to your abode. Of course you’ve prepared yourself with tasty food, a bottle of wine and last but not least, the music. A very thorough investigation of her taste of music in combination with the classical tracks have flown into a well composed playlist for all thinkable scenarios. Since you’re prepared in every single detail and with all the CDs from all the artists that she have mentioned in a conversation with you earlier, they take quite a lot of space. That’s not a problem for you though, since they’re all stored in your media library on your stationary computer.
Every situation demands its place in the apartment and also the right choice of music. Because of this you’ve placed four receivers that can receive music from your computer by wireless transfer. There are speakers connected to the receivers and you’re now ready to meet the girl of your dreams. Your hope is of course to finish the evening with some cuddling, so that you in the right moment can let sweet music ála Barry White flow from the speakers in the bedroom and at the same time seduce your loved one. Choosing the right some and at the same time play it in the right moment is no problem for you, since you have your radio-based remote with navigation. It’s laying there underneath the pillow and waiting.
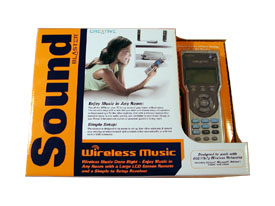
Sound Blaster Wireless Music is, as the name indicates, wireless music, or wireless transfer of music. When I mention wireless transfer of music I instantly get the question that everyone is wondering about and if the music maintains a good quality or not. This arises from the fact that the product is being mixed up with earlier products for wireless transfer of audio and video, that often didn’t work perfectly due to interference from household appliances, materials in walls and roofs and also movement in the signal’s path.
Sound Blaster Wireless Music doesn’t send the music in realtime but uses available WLAN-technology to wirelessly transfer a sound file to an MP3-player in the receiver that then plays the music without any deteriorated quality. In short, it’s a wireless network with an MP3-player in it, that together with the server software becomes a concept.
You control the receiver with a remote that also operates using radio technology, thus you don’t have to point the remote toward the receiver or even be in the same room as it. Using the remote, you can also browse through all the songs you have on your computer.
The system handles up to four receivers, which all can play music independently of eachother at the same time, from the same media server.
Since the product is a combination of Wireless LAN and a MP3 player, the specifications are a bit mixed. The MP3 player could almost be compared with a MuVo.
|
Creative Wireless Music
|
|
| Standard | IEEE 802.11b |
| Interface | USB 1.1 for configuration 2x. Audio-Out, RCA-sockets, analogue 1x. Audio-Out, SPDIF, digital |
| Antennae | Built-in antenna 2,4 GHz (Base unit) Built-in antenna 433 – 924 MHz (Remote ctrl) |
| Frequency | 2,412 – 2,472 GHz (Base unit) 433 MHz – 924 MHz (Remote control) |
| Speed | 1-11 Mbps |
| Channels | 11 Channels (USA and Canada) 13 Channels (Europe) |
| Safety | 64 or 128 bits WEP-encryption |
| Range | Up to 50 metres indoor and 150 metres outdoor depending on the signal strength of the base unit. The remote control has a range of 10 metres. |
| Sound format | MPEG Audio Layer 3 (MP3) Windows Media Audio (WMA) |
| SNR | Up to 98 dB |
| Power supply | 6 Volt AC-adapter (Base unit) 3x. AAA-batteries (Remote control) |
| Display | 132 x 64 pixels LCD, backlight (blue) |
| Size | Bas eunit 17 x 14 x 3 cm Remote control 7 x 18 x 3 cm |
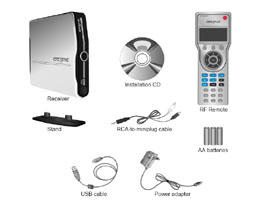
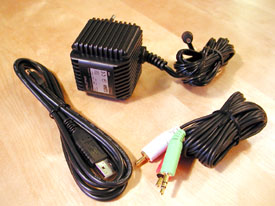
The box contains
1x. Base unit with foot
1x. Remote control
3x. AAA-batteries
1x. USB-cable
1x. Adapter for the power supply
1x. CD with drivers and software
1x. Sound cable, stereo (2 x RCA for 1 x 3,5 mm stereo socket)
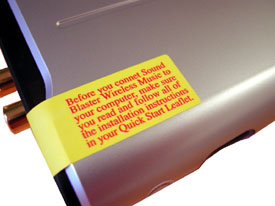
As the text says, you should read the manual before you plug the unit in.
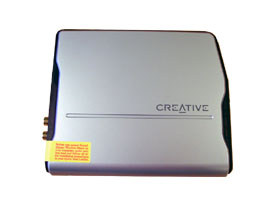
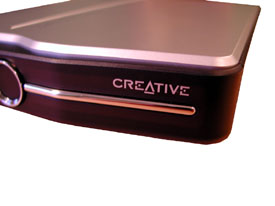
A really popular color of computer equipment and other home electronics at the moment is black and silver and therefore the product is just that, black and silver colored. The placement of the product is not given since it’s wireless so you can choose if you want it to stand up or lie down, depending on where you put it.
I actually like the product’s look, even if one might think it’s too much plastic on today’s electronic products. Plastic is the cheapest though even if I’d want everything in brushed aluminum.
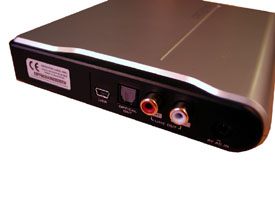
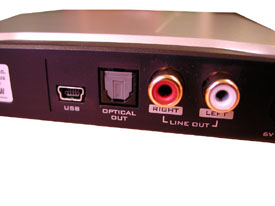
On the back you find all the necessary in- and outputs, which aren’t too many. One USB connection stands for the communication between the wireless receiver and your computer for configuration (if you haven’t got a DHCP assigned IP adress) for the first time, then that cable isn’t needed anymore. You connect the sound to speakers of your choice through a digital output (SP/DIF) or two analouge outputs (RCA). Stereo sound is the only of interest here.
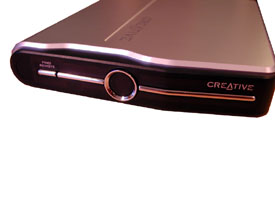
The small round thing in the middle of the receiver’s front is actually not a button – which I first thought – but a window which displays different colors depending on the status of the unit. Lamps on the inside stand for the glow and they are lit when a connection is established and if transmission is on-going.
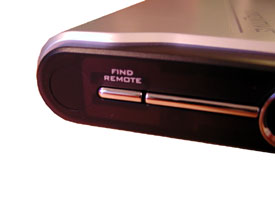
To the far left is a small button labeled ”Find remote”. If you remember the small keyrings from the 80’s which you could whistle to which then answered by beeping, you will feel nostalgic. By pressing the button the remote control beeps and you can simply locate it. Very good to have when you’ve had a party and can’t remember where you had it last, or if you even had it.
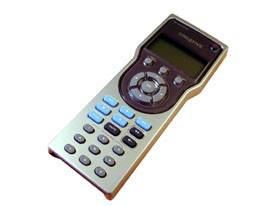
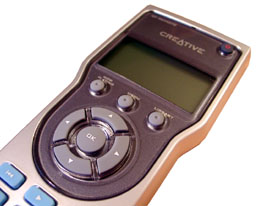
The remote control looks and is very big and purely spontaneously you might think that it is clumsy and not quite thought-through. Apperance is deceiving though, this is really not a remote control, it is a free small computer which communicates with the wireless receiver and the media server through radio waves. On the remote control’s display you can control the whole function, i.e. listen among your songs on the server, start playback, raise and lower the volume and so on.
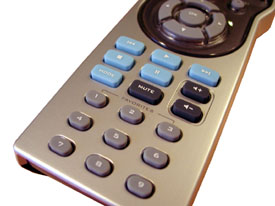
The blue buttons controls the playback of your music, i.e. play, stop, forward, rewind etc. The grey buttons below are numerical buttons which you use as usual to select a song.
The three buttons at the top of the remote control controls different functions and you can also navigate the menues with the arrows. The remote control’s display is an LCD and it has got a blue background light.
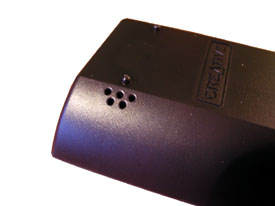
On the back of the remote you can see the small speaker which beeps when using the ”Find remote” tool on the wireless receiver.
Before we install the product there are a few things you should know. Sound Blaster Wireless Music has to have access to a wireless network with or without a DHCP-protocol. It also requires a computer with MediaSource installed.
An advantage is that Wireless Music doesn’t require the computer to have a sound card. Thus you can install the software on a existing server which doesn’t have a any multimedia what so ever.
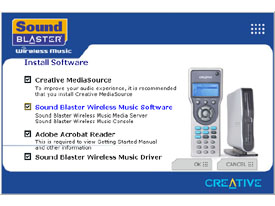
With that said we insert the CD that comes with the package. On the disc you can find Creative MediaSource, which is a mandatory part of the installation. MediaSource might already be available on your computer, if you have an Audigy-sound card, the latest version is recommended though. The disc will update to the current version.
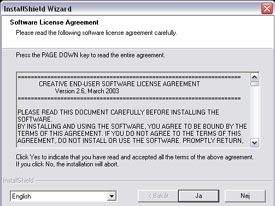
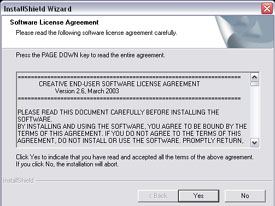
You can choose not to install Adobe Acrobat Reader since it won’t affect any functions, but everything else has to be installed. Choose OK when you have made your choices and you will get the ordinary license agreement which you accept to get further ahead.
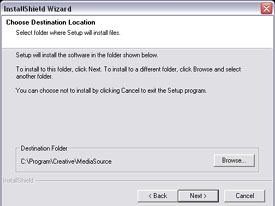
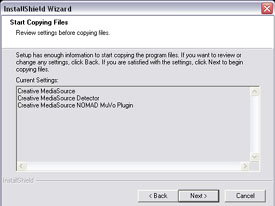
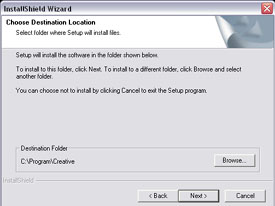
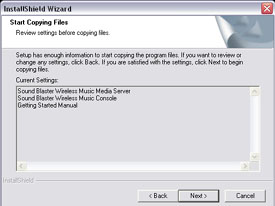
Continue with the installation by picking the folder where you want to install the software. If you don’t have a reason to change I recommend that you keep the suggested location and continue. Chosen components are shown, continue by clicking next.
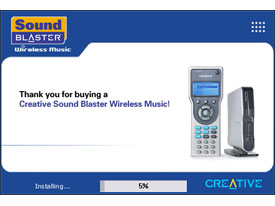
The files are now being copied to your harddrive, which may take a while.
When the installation of MediaSource is completed the next installation will begin. Same procedure this time as well, namely the license agreement.
Choose destination for the software and check that they match your choices and continue by clicking next.
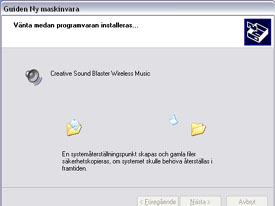
The files for Wireless Music are now copied, the server software and drivers for the USB-connection that will be used for configuring the receiver.
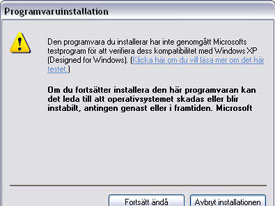
During the installation will popup a message that the driver hasn’t been certified by Microsoft. This is normal and only means that Creative hasn’t paid Microsoft any money to have them say that it is ok. Continue the installation anyway.
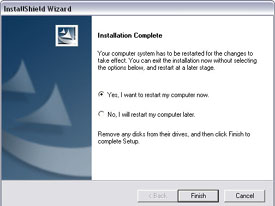
The installation is now finished, reboot to complete.
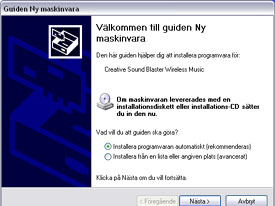
When you have started up your computer again you can connect the receivers power and then the USB-cable between the receiver and the computer you just installed the software on. A new hardware will be found (the receiver) and continue with next.
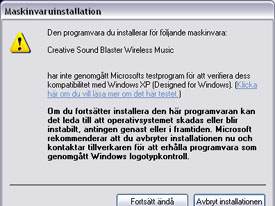
Once more you have to accept the driver even despite the fact that they haven’t been certified by Microsoft. Files will be copied and it will take a few seconds. A small messagebox will notify you when the unit is installed and ready to be used.
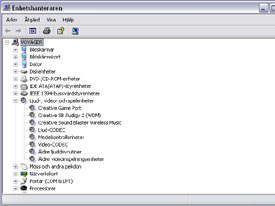
When the installation is complete you can look in device manager and find it there.
The next step will be taking a closer look at your network configuration. I don’t have a DHCP-protocol, and I have WEP-encryption and frozen MAC-addresses on my network, which require that we configure both the receiver and the node.
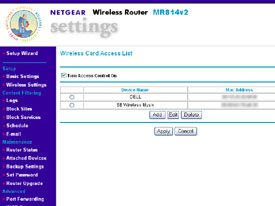
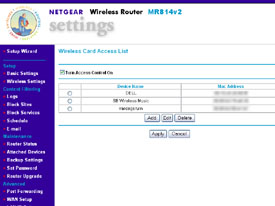
The first you should do is log on to you node/accesspoint and localize the setting for the MAC-filter. There you enter the MAC-address that the receiver has (can be found on the sticker on the bottom). This allows the accesspoint to connect to the product.
If you don’t have MAC-filtering activated you can skip this section move to the next.
Start ”Network Setup” which has revealed itself on your startmenu as a step of the installation. Don’t forget that you need to have the receiver connected via USB for this to work .
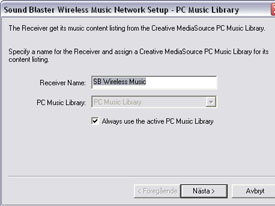
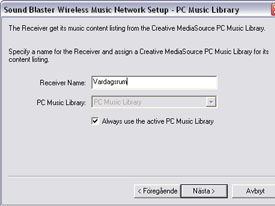
The first thing you should do is to name the receiver. If you are to connect several receivers to your server it might be a good idea if you give the them separate names which might give you a hint of their actual placement, e.g. ”living room”, ”bedroom” and so forth. This will make navigating with the remote much easier.
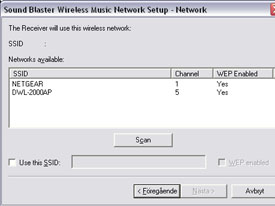
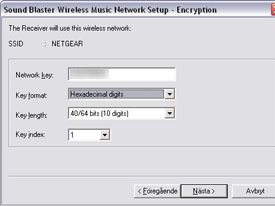
You should now see all the available wireless networks which it can find. I have two at home and chose the one I want to use, namely the one called ”Netgear”. As you can see WEP-encryption is activated which means you have to enter a network-key to able to connect.
Enter the network-key as it has been set in the accesspoint.
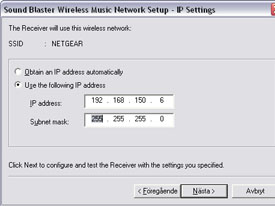
Continue with assigning an IP-address for the receiver. Keep in mind that you have to assign it an IP-address which is on the same subnet as the rest of the network, or at least the accesspoint and MediaServer.
You don’t have to this if you have DHCP.
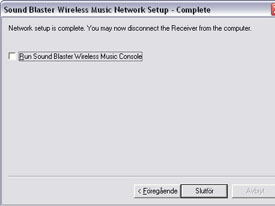
Click finish and after a while the communication will start.
Continue in the same way with the remaining receivers. I have used two in this review , and the other was named ”living room”.
|
|
I had to add the other one as well in the list of allowed MAC-addresses to make it work.
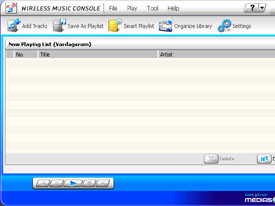
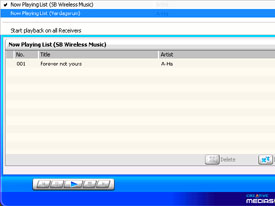
When the installation is completely finished you can start listening to music. By starting ”Wireless Music Console” you can chose in realtime what should be played where and what’s next in line. With a small menu you can switch receiver to see what’s playing.
Here you can also change the music and playlists and everything else you usually do with the remote. Very funny if someone is sitting and listening to to something special in the next room.
When it comes to the functions it’s pretty dead on. If you’ve operated an MP3-player with some functions for playlists and similar, especially a product from Creative, you’ll recognize the system pretty fast.
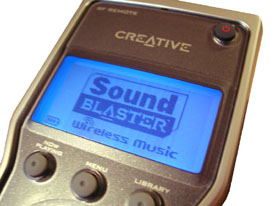
When you start the product a logotype is shown where it says ”Sound Blaster Wireless Music” on, of course. The backlighting is blue, which is ”popular” at the moment.
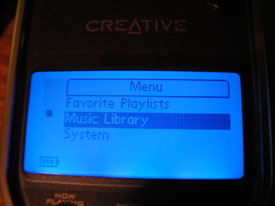
The menu system lets you watch your playlists, look at the library (that is in MediaSource) or look at the system settings.
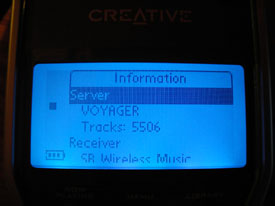
If you click on ”System”, the name of the computer where the server software is installed will be shown in the window. You’ll also see the total amount of audio tracks (songs) that are on the computer.
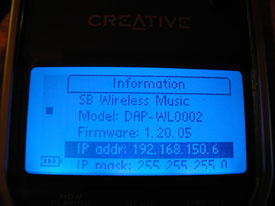
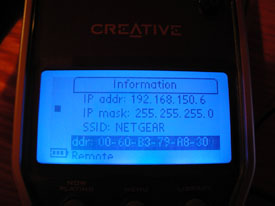
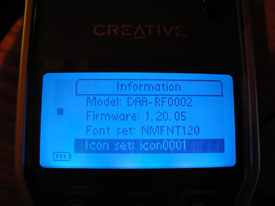
If you browse downwards you will see the model of the receiver, which version of the device’s ”firmware” that is installed and also what IP-address it’s using for the time being. This can change itself if you have automatic assignment of addresses in your network.
Information regarding the access node is shown a little bit further down, followed by information about the remote. Both products can be updated with new firmware if you encounter problems or if there are functions that have to be corrected in the future. The actual version you’re using is always viewable here.
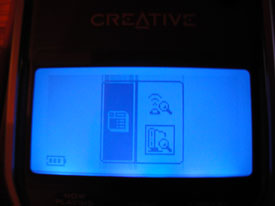
With a simple push of a button you can click an icon that lets you choose which receiver to connect the remote to. It’s the matter that the remote communicates with the receiver, which in its turn communicate via the wireless network to the server where the music is located.
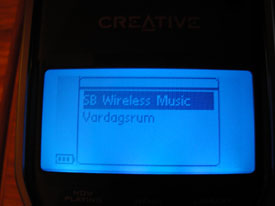
A list of receivers within the remote’s range will be shown in the window and you choose the one that you want to control. When you’ve began playing a song on that receiver, you can easily switch to the next and start another song there.
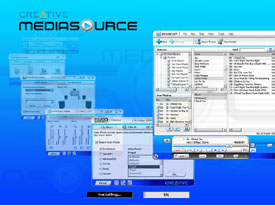
Just as we have mentioned before, Wireless Music makes use of MediaSource, which you who already have a soundcard from Creative might be familiar with. MediaSource is more then just an application to play music with, it also works as a library where all music as stored and analyzed. A similar function can be found in the Media Player included in Windows and in Media Center.
The music which can be played back on the wireless receivers via the remote control must exist in the MediaSource. You can choose different ways of storing the music depending on where and how you want to do it. Either you import the music into the catalogue from different locations on the hard drive or the network, or you activate supervision on a folder to which you later copy the music to. Everything which is being stored in that folder will be available in the catalogue automatically.
A critical factor when it is about navigation in the catalogue is how the music is ID tagged with so called ID3 tags. MediaSource (just as the Media Player) makes use of these tags when importing the name of the track, the artist, the name of the album etc. If the information is missing or wrong you might get some trouble finding the music later on.
Another function Creative use is that it analyze the music in your catalogue. The analyze means that the speed and volume gets analyzed so the playback itself can be done with the same sound level on every selected track. This gets rid of the irritating moment when one track with really low volume is being followed by a track with really high volume, something which usually means that you have to adjust the volume all the time all by yourself. One drawback with this is that it takes a lot of time. My catalogue with about 5500 tracks took about nine hours to analyze, but you won’t need to do this more then once. The computer I used for the analysis was a Pentium 4 3.0 GHz with 1GB RAM.
Anyone can handle the product very well and the playback starts almost immediately, that is to say no long waiting time or so. During playback I haven’t noticed any problems with interruptions, distorted sound or any other disturbances in the music. However, there are a few things one might get irritated for. You can not start a track with the OK button while you browse through the catalogue; you have to go down to play. The buttons on the remote control could have been illuminated since I, anyway, usually listen to music when it is a little bit dark in the room, and then you can’t see good enough to navigate. However, you learn where all the buttons are located after a while, but it could have been good anyway.
If you compare to similar products this one has a big advantage due to its remote control where no TV or other monitor is needed to show the tracks. You can browse through the media catalogue via the remote control which communicates via radio and not IR. We tested so called ”multi-streaming” in this test, which means that two or more receivers were used and independent of each other playback music in different rooms. Sadly this didn’t work out very well in Windows XP, but Microsoft has announced that it will work better with service pack 2. To control this we tested to install the server on a computer with Windows Server 2003 and it worked flawlessly. Multi stream doesn’t work on machines with Windows 95, Windows ME or Windows 98.
Sadly you can’t playback a CD directly in the MediaSource; you have to store it on a hard drive in MP3 or WMA format first. This is a pity I think, even that you probably always store your music on the hard drive anyway.
As a conclusion I must say that I am positively surprised over this product and how good it really works. You must keep in mind that the actual limitations when we are talking about normal wireless network even are present here. In other words, it might work worse if you live in an apartment with concrete walls including a lot of reinforcement bars or other stuff which might disturb the signal. But since the music is being played back inside the receiver which also has a buffer, a continuous stream of data is not necessary.
|
Creative Wireless Music
|
Pros: + No soundcard needed in the server. + No TV or other unit necessary to chose music. + Centralized storing of music. Cons: – The analysis procedure takes a really long time. |






Leave a Reply