


Cooling solutions which purpose is not solely to achieve low temperatures are getting rare today. If you want a silent computer, you need to get parts from different stores and manufacturers, with nobody having everything you need. A while ago, Zalman showed off a passively cooled case, but since then not much have happened the last months. NordicHardware proudly presents the first (?) vast preview of this case that Zalman refers to TNN500A (of which the former part is an abbreviation for Totally No Noise).
Cooling solutions
which purpose is not solely to achieve low temperatures are getting rare today.
If you want a silent computer, you need to get parts from different stores
and manufacturers, with nobody having everything you need. A while ago, Zalman
showed off a passively cooled case, but since then not much have happened
the last months. NordicHardware proudly presents the first (?) vast preview
of this case that Zalman refers to TNN500A (of which the former part is an
abbreviation for Totally No Noise). It is more or less a hefty 25 kilogram
heatsink with just enough room for computer accessories. How this is possible
is explained later on in the review. This is a prototype of the case, hence
we are not allowed to publish any benchmarking results with this system. A
review of the final version will be done later on, but until then you’ll have
to settle with this preview.
|
Specifications:
Zalman TNN 500A |
|
| Weight |
25
kg |
| Material |
Aluminum
|
| 5.25"
slots |
4
|
| 3.5"
slots |
4
|
| Slots
for PCI/AGP cards |
5
|
| Size
(L*W*H) |
400x286x607mm
|
| CPU cooler |
ZMC
6HA |
| VGA cooler |
ZMV
2HA |
| HDD cooler |
ZM2HC1
|
| Approx.
price |
€700-€1000
|
Seemingly, this
is no ordinary case. The package weighs a beefy 25 kilograms, which is about
four times as much as an aluminum case in the same size. The TNN 500A is somewhat
bigger than a miditower; almost twice as wide and 10 centimetres taller. The
reason for the massive width is primarily the two gargantuan heatsinks that
reside on both sides, weighing in at about 5 kg a piece. The main purpose
with this case is to get the computer as silent as possible, which is achieved
in several ways. Silent coolers for CPU, VGA and HDD are included and the
massive design eliminates all vibrations and sounds from the harddrive(s).
In addition, a silent power supply is included.
| Passive?
How? |
A lot of work
is needed to design a passive system. Zalman has a very smart solution were
all the heat from the components is transferred to the case’s headsinks. These
heatsinks leads all the heat from CPU, GPU, etc away from the case.
Due to the exclusion
of fans, this entire cooling solution relies on something that is known as
convection. Convection is the natural movement of air. You may read more about
it in our air-cooling article here.
In order to succed
with the heat transfers, some sort of heat conductor is needed. Here, Zalman
uses heatpipes. Heatpipes are briefly pipes filled with a substance which
distributes the heat equally. This substance is a form of gas which vaporizes
due to the heat on the hot side. The gas subsequently tranforms into condense
and leaves a lot of heat at the cold side. Read more about heatpipes here.
Look at the box
completely put together, it will simply take your breath away. It’s quite
frankly a gigantic cooler with two LEDs on the front and two grips on the
upper side. The whole box is anodized in a black color that conducts heat
very well. We can see that the coolers are angled in a way from the downside
and up; this to maximize the convection effectivity. On top and at the bottom,
there are a lot of holes to give the air a chance to circulate- entirely without
any fans. Shortly, this means that there’s only the natural movement of air
that ventilates the case.
|
|


On the back of
the cover, there is actually something that diverges from the overall ubiquitous
layout: white/gray text. This text tells you a little about the box, what
standards it comprehends, and more. If you ask me, the unit has a very clean
design that makes it look a lot less boring than your ordinary case. A LED
and a small Zalman logo on the front differ from the monotonous look, but
apart from this detail, the case is made completely from stainless black metal.
The reason to why it seems to be stained is due to the box being very susceptible
to fingerprints, which obviously show up after hauling around the box all
the time. It takes a lot of strength to twist this 25 kilogram piece.
|
|
|


The front and
the back have got two big doors on it. These are only used when modifying
something inside the computer or to switch it on/off. These are held shut
by the same mecanism spotted in certain kitchen doors. Slam the door to close
it, and press it to unlock. Incidentally, a note on the front says "push
to open".
As opposed
to what you would want to expect, the inside actually has got some style.
The light-blue heat transfer blocks and the golden heatsinks
create a good contrast towards the matt black background. The model number
is printed in large dark yellow letters, also creating a good contrast against
the black. Every heat dissipater is already specially fitted into the case,
thus nobody will have to worry of parts that do not fit. There are numerous
prefabricated holes for the blocks, providing support for such a wide range
of mainboards as possible.
|
|


It doesn’t
really look like a case but rather like a framework without the vital parts,
leaving a lot of space to simplify installation and it to create a constructional
look. The functionality is wonderful, with large thumbscrews for wherever
they might be needed, and a good amount of holes that are easy to locate,
yet again creating an environment which is very user-friendly The the passive
power supply is also to be found here; a beautiful part that we will get back
to later on in this article. A rather annoying fact is that there are three
differently sized screws, forcing you to use three different screwdrivers.
|
|


The control
panel is also a new, rather nifty, variant from what we are used to, and is
actually based upon modules. There are two empty module spaces, where we may
put whatever we like, and two that are already occupied when the case is delivered.
In the lower one, you will find the Power/HDD LEDs
and the power/reset buttons. The upper panel accommodates the now-standard
USB 2.0 ports, at least two of them, in addition to a button labelled “Light”.
When pressed, it lights ten very intense blue LED’s that lights up the case
good – perfectly suitable for use when installing parts in a dark room.
The CPU cooler
consists of four main parts. First, it is a massive copper block which weighs
in on approximately 750 grams. This block has a direct contact with the processor,
thus it transfers the heat upward towards the next part which is the heat
conductor. For the CPU cooler, six heat conductors are used with a diameter
of 6 mm. They are anodized in gold and look fairly well in my opinion. The
third part consists of a blue-colored lid that is screwed on top of the whole
construction. It is partly there to squeeze together the heat conductors and
the copper block, but also to increase the contact area facing the heat conductors.
|
|


To transfer the
heat from the heat conductors to the heatsink, blocks are needed and mounted
on the case. These are completely anodized in blue, and three in number. The
block fits every mainboard that follow Intel’s specifications. Mounting accessories
for AMD Athlon 64 are also included, although we did not have such a system
available for testing. The parts seem to work well and to be easily installed.
|
|


The installation
went quite well, despite that this product only comes with mounting devices
for Athlon 64 and Pentium 4. If you want to use this case with an Athlon XP,
some additional parts will have to be procured. There isn’t any official support,
but the extra parts can profitably be crafted at home. While it isn’t particularly
difficult to manufacture them, Zalman still should have thought of all the
Socket-A owners that would like to use this case.
|
|


Mounting the
cooler on a Pentium 4 platform is a nobrainer. For starters, two purple-colored
parts are placed in the black fan mounter, and the large piece of copper is
put on top of it. Added to this construction are the heat conductive pipes
with thermal compound on all contact areas. To achieve good contact, the top
is mounted, once again with a lot of thermal compound to get a better heat
conductive area.
The VGA cooler
consists, in accordance with the CPU cooler, of four main parts. All the parts
principally have the same function, but they are very differently designed.
The part that transfers the heat from the GPU is much smaller than the equivalent
one for the CPU block. Furthermore, it is solely made of aluminum. It is anodized
completely in blue, including the underside. I hope that Zalman has used an
extremely heat conductive paint, since the consequences can become pretty
exteme otherwise. No one wants to see a new graphics card burn up because
of such a silly thing.
Beyond that,
most of it is on par with the CPU cooler, except that the graphics card cooler
only uses two 6 mm heatpipes and is fine with one block on the case. The reason
behind this is that graphics cards dissipate less heat than processors, thus
it does not have the same requirements on cooling.
|
|


Mounting the
graphics card cooling is a bit tricky, but can however be done without any
major issues. Zalman has been kind enough to send two different set of blocks
so that the solution should fit any graphics card. The first thing you should
do is to remove the old heatsink and clean the graphics card processor from
thermal compound. Then go ahead and apply a thin layer of new paste, and mount
the first block. There should be a rubber ring over and under the graphics
card, so you get some sort of sandwich in which the graphics card is protected
in the middle.
|
|


The most difficult
task is completed. Now, it is just to install the graphics card inside the
case, mount the heatpipes and mount the top of the block. Observe that thermal
compound is to be used also in these joints. It is somewhat difficult to mount
on the topside of the block when the computer is installed in the case since
almost every scewdriver is too tall and touches the bottom of the case. Zalman
put some effort into finding a better solution, even if it may be troublesome.
Perhaps this
is the most interesting part: the passively cooled power supply. If you sell
a case with passive solutions, it naturally also needs a passive power supply,
and it is doubtlessly difficult to develop such a thing. There are many small
parts which need cooling, and you don’t have any air flow to your advantage.
All the heat is transferred via an aluminum plate which is directly mounted
flat against one of the large heatsinks.
The power supply
is split in two parts; one with all the connectors and one that does all the
work. The contact box simply consists of an on/off switch, a power cable connector
and a button to select between 110 and 230 volts. It is neither cooled nor
interesting. No, interesting part is the real power supply. I was thinking
of tearing it apart to show how it was built and what components it consisted
of. Sadly, everything was bolted and glued together so that idea was ephemeral.
|
|


The PSU is the
only thing in the whole case that won’t last forever; everything else lasts
more or less so. It has a lifetime of 50,000 hours and according to the specifications,
there is only a 20 % loss in the transfer between alternate currrent and direct
current, which roughly is about 10 % lower than ordinary power supply units.
To maintain high efficiency is extra important for this power supply since
all the losses turn into heat, and you definitly do not want that in something
that is supposed to be passively cooled.
|

Since I had no
access to any oscilloscope, I could not measure the ripple and noise on the
voltage lines, although I received specifications on this from Zalman. Remember
that the source of these graphs is Zalman itself and can therefore be done
under very good circumstances. Still, it’s better than nothing. +3.3V has
a ripple of max 44.8mV, +5V on 31.2mV and +12V on 54mV. The tests were done
in the following way (directly from the English source) "At each of the
DC outputs, connect a bypass made of a 0.1uF ceramic capacitor and a 10uF
electrolytic capacitor and measure with an oscilloscope with input impendance
of 1Mohm at the frequency frange of 20MHz."
Note that the
final version will have a power supply of 400W, and have other specifications.
A ZM2HC1 is enclosed
in the package; a harddrive cooler with several heatpipes. I do not really
understand the design of it, since the only thing that happens is that the
heat is transferred evenly over the both sides on the harddrive. The gain
is more contact with the air, but still, it is not an optimal design. Nevertheless,
the noise should be reduced quite heavily, since the whole construction is
hanging in rubber distances which principally eliminates all vibrations that
normally would continue to the case and cause noise. It feels a bit unecessary
in this case (haha!) however, since it requires quite a harddrive to make
25 kilos start vibrating. Surely, it is indeed nice, but since the case completely
shuts out every curious glance, the aspect isn’t really needed.
|
|


The mounting
device for harddrives is ingenius. There are rails on the inside of the case,
attachable with screws from the outside. By releasing some of the pressure,
you can pull out the rails particularly intended for harddrive installation.
Simply attach the harddrive with screws through the holes underneath, push
the metal rail back in and fasten the screws on the outside again. Can things
get easier than this?
The same type
of design is used for the 5.25" units, but instead these rails are on
the top of two metal plates which you attach the units to. By untightening
the screws on top, you may remove all of the 5.25" units. The plates
are shown on the image that shows the ZM2HC1 mounted.
You might wonder
what keeps the case up; ordinary feet would be crushed like pepper grains
under the hefty load. In this area, Zalman has definitly not saved its strength;
the feet can put up with a whole ton each! In other words, the case is good
for a whopping four ton, which correspondingly is an extensive amount of harddrives
to overload the feet. The feet are also adjustable vertically – on the lower
setting, the case rolls on wheels while it stands fully stable in the upper
one. In addition, they consist of rubber which, effectively killing vibrations.
|

To prevent electro
magnetic radiation, two large and four small EMI filters are enclosed. These
are meant to be mounted on different parts; the large ones on the power cord
and the graphics cable cord, respectively, and the small ones for the network
cable, mouse/keyboard etc. On the front and rear side of the case, there are
also EMI interception blocks through which you are supposed to drag the cables.
Doing this minimizes radiation.
| Optionals |
If this, contrary
to any expectations, wouldn’t be enough, there are several optional choices
that may be added to the case. The first is a heatpipe cooler for the northbridge
– a very useful little gadget. Although the ordinary passive heatsink from
Zalman is good enough in most cases, you must consider that there is no airflow
in the one we’re currently reviewing, thus the heatsink have to rely completely
on convention.
For those who
want more harddrive coolers, they can of course be bought from the nearby
retailer. In other words, it is no special model for this case; just an ordinary
ZM2HC1. If you think harddrives sound too much in general, there are SD RAM
harddrives available available for installation in a PCI slot. This is much
faster than traditional harddrives, and is in addition completely silent.
The only counterpart is that they are tremedously expensive; those that exist
today cost €2600-€3600 for a mere 4 GB.
In January 2004,
more accessories will be out for sale; an upgraded power supply for those
who need a more powerful one and an UPS. The specifications of the power supply
are not yet known.
It
has been interesting to have this case for a visit for this preview. As aforementioned,
it isn’t every day you receive something that is completely new and innovative,
and certainly not something that is more or less world exclusive. Unfortunately,
I can not give you any exact benchmark results, but it definitly works well
enough. The installation took about 3-4 hours total, including reading the
manual, so it is not time-wasting, albeit it isn’t anything you mount in a
good 15 minutes either.
The idea with a completely passive case is very good, and the realization
is also very satisfying. Massive blocks that transfer the heat via heatpipes
is probably the most optimal solution to the problem, and to also implement
a great design is a nice touch by Zalman. The case has everything that is
needed for a passive computer, except a northbridge cooler. But that can be
bought seperately.
It
is definitly nothing for the ordinary man, the weight makes it ungainly for
LAN parties and the gargantuan size makes it difficult to put away somewhere.
You should not place it in a narrow space or under a desk since the cooling
relies on convention, or the natural movement of air. The price is not suitable
for everyone either, as it’ll probably end up somewhere around €620 and
€880 when the final product arrives. The most useful range of application
I can think of would be offices that require more of the computer. A silent
office greatly enhances working ergomonics.
Something I would really like to see support for is dual CPUs, but it would
be difficult to implement since dual mainboards differ very much in design.
Furthermore, it would increase the load on the heatsinks remarkably, so it
would probably require larger heatsinks on the sides. Another thing is that
Socket A support would be nice. We will see if Zalman will comply with final
version of the product.
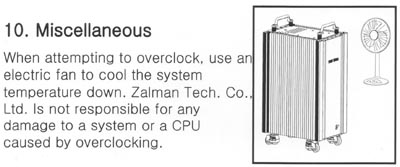
I
finish the preview with the last page in the manual, which gave me a hearty
laugh when I saw the picture.
Thanks to PCB Distribution which made
the preview possible!
Feel free to comment in the
forum!


Leave a Reply