

Fresh face Ikonik is launching several new products and we will look at one of its more stylish cases. Tough Ikonik Zaria A20 isn’t just a designer product but also offers some interesting features.
Ikonik is a fairly new player founded by a former head engineer at Gigabyte. The fact that Ikonik’s first creations looked a bit familiar should perhaps have tipped you off if you didn’t already know. I took a quick look around and I couldn’t find many reviews of its products in the West. Ikonik presented its first products at Computex earlier this year and managed to get some media exposure through its innovative case and power supply designs. The case we’re going to review today is from the Zaria series. More specifically the Zaria A20.
The reason I wanted to look at this one instead of the other cases Ikonik has on its website was mainly a matter of personal taste. If you’ve read any of my previous reviews you know I bend toward the clean and stylish cases, and don’t go for the blingy, flashy dealies. Zaria A20 looked like a case I might like so I decided to give it a shot. The box was a bit damaged when it arrived, which killed the mood a bit, but when I unboxed it, removed the protective films, took a step back and just looked at it … clean.
Let’s jump to the specifications.
 |
|
|
Ikonik Zaria A20
|
|
| Case: | Miditower |
| Side panel: | Perforated bezel or windows (both included) |
| Measurements (HxWxD): | 44 x 20 x 49.1cm 17.3″ x 7.9″ x 19.3″ |
| Weight: | 11.3lbs / 9.3kg |
| Motherboard support : | miniITX, microATX, ATX, CEB |
| Cooling (fans): | Right – 2x 80mm (included) Back – 1x 120mm (included) Bottom – 1×120 (optional) Front – 1×140 (included) |
| Material: | Aluminum |
| Internal units: | 5×3.5″ |
| External units: | 4×5.25” 1×3.5″ |
| Expansion slots: | 7 |
| Power supply | – |
| Color: | Black & Silver |
| Other: | SIM – System Intelligent Module Completely tool-free Cable ties Thermal probes for the SIM USB extension Two power buttons Side window Panel with eSATA, USB, FireWire and audio connectors Rubber supports Microfiber cloth Washable dust filters Holes for water tubing |
| Price: | $160 |
Unboxing the case left me rather excited because this was a design that looked fresh and new to me. At the same time it wasn’t too out there. I also noticed that it was very light when I lifted it out of the box, and that it was a lot heavier in the front than in the back. This is mainly because that’s where most of the metal is, e.g. the drive bays, but also because of the very sturdy door that opens and closes with a rigid feel to it. Quality feel all the way. It should even out when you get the power supply in there.
Preinstalled fans usually don’t make us jump for joy because they add a lot to the price and are seldom as good as you want. In the case of Ikonik Zaria A20, the fans are not top notch, but not too shabby either. The fans themselves do not have variable RPM, but you get a very potent system for controlling them. Ikonik calls it SIM – System Intelligent Management. It comes with six fan connectors and four thermal probes that you can place to your liking. SIM reminds us of ESA and it offers many similar features. There will also be a cheaper version without the SIM.
We’ll take a closer look at it later. Below are the specifications of the three fan models included. Considering the 160 dollars Ikonik is asking for the case the fans doesn’t seem to add too much to price.
|
Ikonik Fans
|
||||
|
Size
|
RPM
|
Airflow (CFM)
|
Noise (dB(A))
|
Power (W)
|
| 80mm |
2400
|
26.61
|
28.6
|
2.28
|
| 120mm |
1800
|
77.85
|
37
|
3.6
|
| 140mm |
1800
|
89.04
|
36.1
|
4.2
|
Ikonik sends along a small accessory box. It contains stand-offs, screws, cable ties, microfiber cloth, and the one-page manual. Inside the case you will also find the slides for the harddrives and the optical drives.

One slider is missing
|
The manual might seem a little ”thin”, but it contains pretty much everything you need to know about the installation process, including pin configurations for the USB and audio headers.
Moving on to what made me want to review this case.
The outside. This was one of the hardest cases I’ve ever had to photograph. The glossy paint made it a real pain to get good pictures of it, which is a real shame because it really does look good but it was hard to make it justice.
 |
 |
 |
The front is completely blank. The upper part is glossy black and hides the optical devices and floppy, if you are one of those who still use one. Below the black part is a brushed aluminum segment. The right piece with the Ikonik logo is actually a power button, dubbed ”kick start”. If you have the case on the floor you can start it up with your foot, quite nifty although also a potential joy killer if you accidentally push in the middle of a game. You don’t have to have it connected though, but it can choose to use either the kick start or the top mounted power button, or both.
 |
 |
The back looks rather plain with the exception of the two holes at the bottom right that allows you to install the radiator outside the case, if you are using water cooling, and draw the cables in and out of the case with ease. A common feature nowadays but still much appreciated.
 |
 |
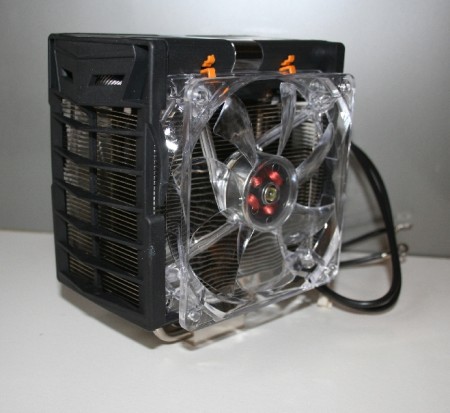
The left and right side panels have their own looks. The back panel, I.e. the right panel, has a cut out window for the two 80mm fans that comes with case. They are protected by a mesh net. The other side panel, the one usually discussed and seen, can either be a mesh net, comes preinstalled, or a plexiglass window that comes in the box. The mesh net is held place by ordinary screws so it is quite easy to remove and replace with the window instead.
 |
The bottom of the case is usually anything but exciting. Ikonik Zaria A20 is no real exception but it holds some noteworthy things. The middle fan bracket comes with just a fan filter from factory, but what you should also notice here is the four feet. They are soft and a bit sticky. They should hinder the case from vibrating and keep it in place if you actually kick it when someone gibs you.
This is what you see when you remove the left-side panel.
 |
If you want, you can install a fan to draw cool air through the filter in the floor of the case. Other than that, all fan brackets are covered. The harddrives are located in a 90 degree angle and be mounted in either direction, either with the cables coming from this side or from the back. You just have to remove the other side panel to mount them in the reversed position. Almost everything is screwless, which in most cases leads to vibrations spreading easily, but Ikonik has managed to move around this by a rather extensive use of rubber pads.
 |
 |
The most interesting about the back of the case is the expansion card mounting system, which we will look at further down the page. Most of the tool-free locks for add-in cards that I’ve run into have been anything but impressive, Ikonik has shown me that it can be done properly. The front holds the drive bays for both harddrives and optical drives. Both needs sliders mounted on the drives before you can mount them in the case. The sliders and the locks have soft supports which should stop vibrations from spreading.
As you can see, there is already plenty of cables drawn through the case. These are going from fans to the SIM located on the back of the optical drive bay, and from the top mounted multimedia hub to the motherboard that will be installed soon. The white and black plastic knobs feels like most plastic, anything but high quality, but they feel OK overall. You usually only install one or two optical drives throughout the lifespan of a PC so it doesn’t really matter because when in place, the drive sits firmly.
 |
 |
The one place where most tool-free designs fails, epically to use modern term, is the locking of the expansion cards. I dare to say that this is the best solution so far. I’m not exactly swept off my feet, but I do believe it will get the job done. It’s tight, and easy to operate. You simply press it in and let it slide into the hole to make it flip back and unlock the cards. When you want to lock the cards in place you push it back in from the back.
 |
 |
 |
This is what you see when you remove the right-side panel. The black box is what we’re going to remove and dissect on the next page. This is just to show you what hides there and how you connect the cables. You do NOT have to do this when you buy the case.
My case was such an early sample that the SIM (System Intelligent Managment) wasn’t entirely finished. However while the case was shipping out, Ikonik sent me the final SIM board and it actually arrived before the case did. This gave me an excuse to rip the case apart even further and install the new SIM PCB.
 |
The new PCB out of the box and ready to be installed. To be honest I couldn’t tell the new from old one, but I guess there was something below the surface I couldn’t see.
 |
Removing the black metal cover was not exactly hard. You need to remove three screws located in the optical drive bay, and they come off quick. You slide the cover downwards to remove the cover. The PCB is held in place by five crews that are easily accessible. Replacing the PCB was an easy task. Getting the back cover back in place took some precision work, but wasn’t exactly hard to do. You then reconnect the wires. I would suggest taking a picture of how the wires were connected before doing anything. If you didnt: the white 4-pin connector is for the LED, the black connector facing downwards is the USB connector, The six white 3-pin connectors are for the fans, and the black cluster of pins to the left is for the thermal probes (included). And last but not least we have the molex power connector to the lower right.
None of the included fans can be controlled through any hardware controller, but instead you get a software package that let you control your fans, and monitor your temperatures. First you select the case you have and then you can start playing with the settings that allows you to sett speeds and alarm levels. You can even turn off the LEDs in the fans lcoated in the rear and on the right-side panel.
 |
The SIM application is actually a rather delicate system that lets you set fan speeds according to the temperature inside the case. You can easily track of which fan is which, and even set up a variety of profiles for different environments. If you want to watch movies you can turn down the RPM, of course risking a bit more heat, or if you’re gaming you can turn the RPM up to keep the temperatures at bay, since the noise from the fans is most likely going to be drowned out by the shatter of shells dropping to the ground or the pompous music playing while you cast your spell to annihilate man… errr .. trollkind. You can turn them off completely if you want.
A very potent application that you get for free with the case. Overall we would recommend to move the settings to the lowest possible. Perhaps even turning off the 80mm fans, because we feel that the 140mm and 120mm fan in the front and rear will do the job just fine.
We hope do test SIM more thoroughly in a follow-up article in the future
Update:
Ikonik has informed us that it has released SIM 1.1 that fixes a number of reported bugs as well as introduce new features:
Version 1.1 has the following changes:
- Multi-language support (English, traditional Chinese, Simplified Chinese, Japanese, Russian, French and German).
- Alarm sound (when the temperature goes over the maximum setting or below minimum fan speed).
- Fix bug for Ra X10 LIQUID.
- Improved silent mode setting to reduce noise.
- All default settings to silent mode.
You can download the new version from Ikonik’s website
Ikonik is a new company, but I really hope it will stick around because this is a case that is up to par and even better than the competition in some aspects. The overall design is personal, but still clean and not too out there. The power buttons is a nice twist, especially as you can choose if you want to use either or both. The solid metal front door gives a nice quality feel to the case, and since this is the piece you will touch the most it’s important that it feels well built, and it does.
Where the design has a personal touch, the layout is quite normal for a case of this price range, which is of course a good thing. When you spend $160 on a case you expect it to deliver more than your run of the mill case. The tool-free system alone makes it stand out, mainly because most of it works really well. The expansion card solution is above other tool-free designs, while the harddrive mounting works really well too.
In terms of cooling, Ikonik sends along four fans, which is quite a lot really. All of them are rather high-RPM fans, but this is probably because you also have the SIM to control them and can turn them down that way. Having the fans run at full speed all the time is not a very pleasant experience, sad to say. Though if you adjust them to a much lower setting through the SIM software they become quite pleasant. Since SIM also offers more features beside the RPM control and monitoring we would like to recommend getting the version with SIM.
The temperatures inside the case should remain decent if you plan your cable management well. The multimedia station on the top of the case, with a very stylish cover, makes the most essential connectors easily accessible. If you want, you shouldn’t have any trouble installing water cooling inside the case even though it may become a bit crowded. Overall, the only thing holding this case back from getting an Editor’s choice award is the choice of fans. They are simply too loud. Even though the SIM can turn them down to a low setting I couldn’t quite make it as whisper silent as I wanted it to be.
If Ikonik decides to go with lower-RPM fans I’m ready to upgrade my decision but right now it will have to settle for just being a very good case.
 |
|
Ikonik Zaria A20
|
|
Pros Cons |
We’ve decided to give Ikonik Zaria A20 our Innovation award for a tool-free design that actually works.

We want to thank Ikonik for submitting the case for review.


